The link below gives a good description of the difference between SharePoint CU, PU and COD and recommendations for when they should be installed.
Using Search Engine Optimization (SEO) Toolkit in IIS 8.5
The guide below will show you how to use the Search Engine Optimization Toolkit for IIS. The toolkit is built for IIS 7.0 and IIS 7.5, but it works in IIS 8.5. The problem is that you can’t follow the guides available for IIS 7.0 or 7.5.
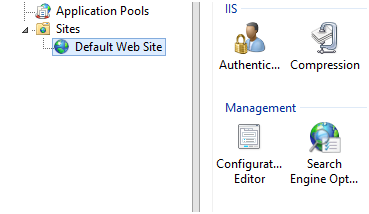
When you have installed the toolkit and wants to use it, you should go to the Default Web Site and choose Search Engine Opt…
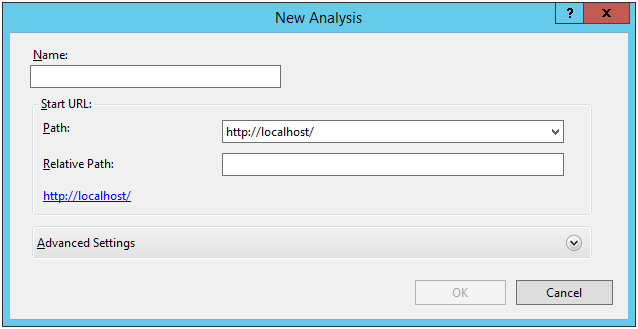
Here it’s possible to Create a new analysis.

But it’s not possible to change the path away from http://localhost/ in IIS 8.5. Please comment, if you know how to do this.
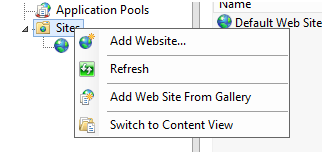
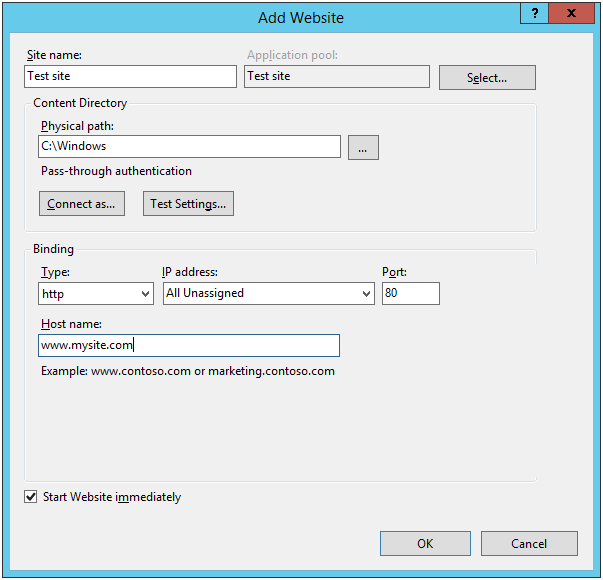
What you can do is the following. Right click on Sites and choose Add Website
You will meet this screen.
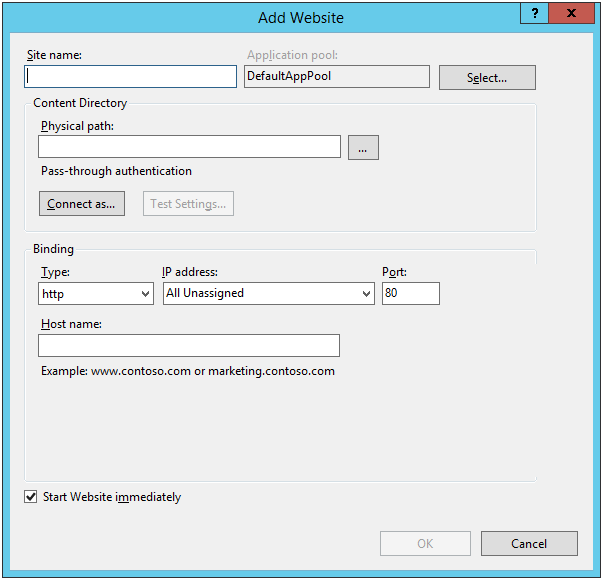
You can enter the information below. But in the Host name (www.mysite.com) you should enter the site you want to check. And press OK, when you’re done.
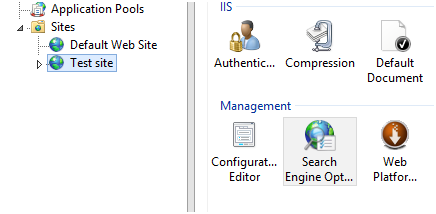
Now you have a new site. Go to the new site (Test site) and choose Search Engine Opt…
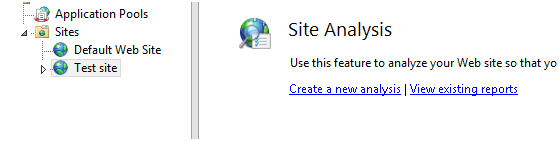
Choose Create a new analysis
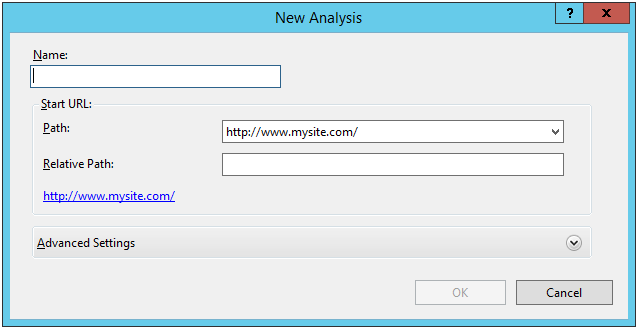
Now you can give the analysis a name.
The path has changed to http://www.mysite.com (or what ever you have entered) and is not http://localhost/.
When you have given the analysis a name, you can hit OK, and the analysis of the website starts.
How to enable videos in SharePoint 2013
This blog post shows you how to enable video playback in SharePoint 2013.
In short you need to
- Activate “Video and Rich Media” feature at SiteCollection Level
- Delete the existing Asset library
- Create a new Asset library
Getting the CU for your SharePoint installation
The pages below shows you how to get information about the CU (Cumulative Update) for your SharePoint installation.
The first page shows you how to get information about the CU.
http://www.brightworksupport.com/find-your-sharepoint-cumulative-update-or-patch-level/
The second page shows you what CU you are using based on the information found through the first page.
http://blogs.technet.com/b/steve_chen/archive/2013/03/26/3561010.aspx
SAS crashes when you connect with RDP
If your SAS-session crashes when you connect with RDP to a server the root-cause could be a check that SAS does for available printers.
To avoid these crashes it is possible to set a parameter in the config-file for SAS. The main config-file for SAS is called SASv9.cfg and in SAS 9.2 it’s usually located in C:\Program Files\SAS\SASFoundation\9.2\nls\en.
The parameter you have to add to the config-file is:
-noqueryports
Clear DNS cache
The command below provides you with a means to flush and reset the contents of the DNS client resolver cache. During DNS troubleshooting, if necessary, you can use this procedure to discard negative cache entries from the cache, as well as, any other dynamically added entries.
ipconfig /flushdns
Disable fair sharing in Windows Server
The post below will show how to disable fair sharing of CPU, disk and network in Windows Server 2012/2012R2. The post relies on information found in here and here.
It’s possible to disable it directly in the Windows Registry with the program RegEdit.exe or using PowerShell commands. Both approaches will be shown.
Disclaimer: Do a backup of Windows Registry in RegEdit.exe (File -> Export, remember to choose Export Range = All) before doing these changes!
It’s possible to disable fair sharing of the CPU using Regedit.exe. You have to change the value EnableCPUQuota from 1 to 0 (zero). NB! You change it by double-clicking on EnableCpuQuota. This value can be found in HKEY_LOCAL_MACHINE\SYSTEM\CurrentControlSet\Control\Session Manager\Quota System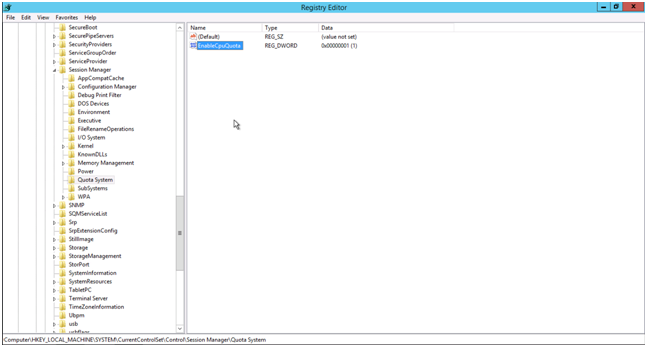
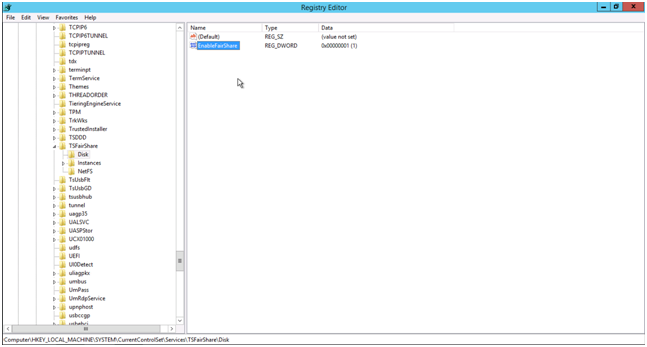
It’s possible to disable fair sharing of the disk using Regedit.exe. You have to change the value EnableFairShare from 1 to 0 (zero). This value can be found in
HKEY_LOCAL_MACHINE\SYSTEM\CurrentControlSet\Services\TSFairShare\Disk
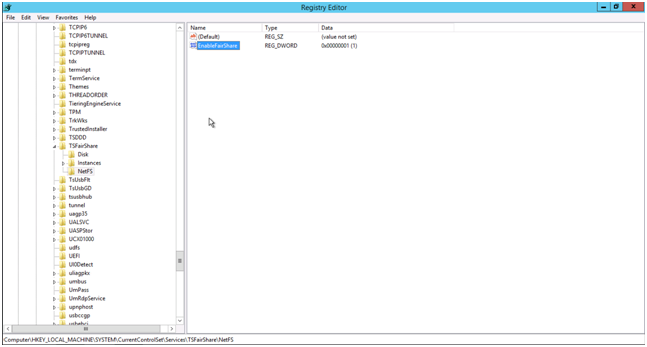
It’s possible to disable fair sharing of the network using Regedit.exe. You have to change the value EnableFairShare from 1 to 0 (zero). This value can be found in
HKEY_LOCAL_MACHINE\SYSTEM\CurrentControlSet\Services\TSFairShare\NetFS
It is also possible to do this through PowerShell where you write the command below
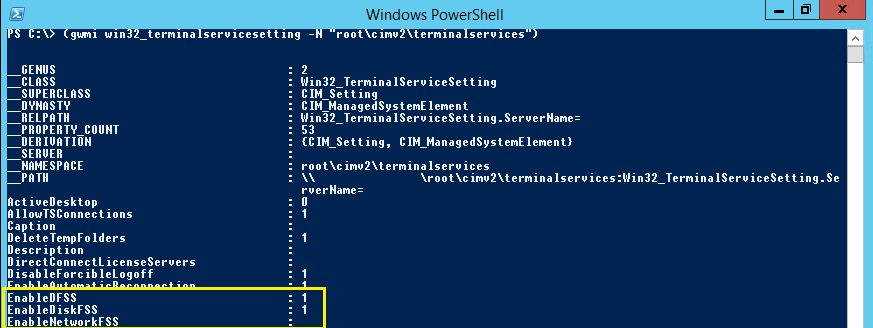
(gwmi win32_terminalservicesetting -N "root\cimv2\terminalservices")
This will give you a list of the settings for terminalservices as shown below. You are interested in EnableDFSS, EnableDiskFSS and EnableNetworkFSS. For some reason EnableNetworkFSS is not set here.
To disable CPU fair sharing in PowerShell you write.
$temp = (gwmi win32_terminalservicesetting -N "root\cimv2\terminalservices")
$temp.enableDFSS = 0
$temp.put()
To disable disk fair sharing in PowerShell you write.
$temp = (gwmi win32_terminalservicesetting -N "root\cimv2\terminalservices")
$temp.enableDiskFSS = 0
$temp.put()
To disable network fair sharing in PowerShell you write.
$temp = (gwmi win32_terminalservicesetting -N "root\cimv2\terminalservices")
$temp.enableNetworkFSS = 0
$temp.put()
Test network connection with ping
With the ping command it is possible to test a network connection
ping <HOST> -t –l 1000
Example ping 8.8.8.8 –t –l 1000 (8.8.8.8 is Googles public DNS-server)
If you run it from a command prompt in windows, it will look as below. The option -t will force the ping command to run until you stop it. It’s possible to stop it by pressing Ctrl-C on the keyboard. The -l option tells ping how many bytes to send with each ping, in this case it’s a 1000 bytes.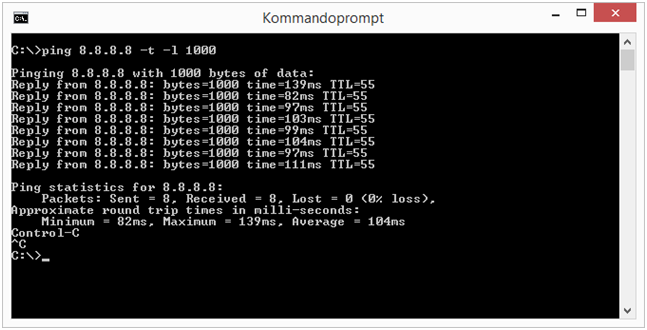 If you want the result of the test to be sent to a file you can send it to a file using the command below.
ping 8.8.8.8 –t –l 1000 > MyTestFile.txt
When the test is done you can look for Request Timeout in the output.
Quote macrovariables e.g. for an IN SQL-statement
The code below lets you qoute the contant of a macrovariables e.g. to be used in an IN SQL-statement.
%let Variables = age height weight;
%let InStatement = %Str(%’)%sysfunc(Tranwrd(&Variables.,%Str( ),%Str(%’, %’)))%Str(%’);
The macrovariable InStatement will contain ‘age’,’height’,’weight’. And can then be used in an IN SQL-statement.
Getting programname for the SAS-program being executed
The code below will get the programname of the program being used.
%macro GetSASProgramName;
	%scan(%sysget(SAS_EXECFILEPATH),-1,"\");
%mend;
%let SASProgramName = %GetSASProgramName;
This will only work on Windows.