Below is a step-by-step guide to install and configure an ODBC-driver for SAS SPD-server. Be aware, that this guide installs the 64-bit version of the ODBC-driver.
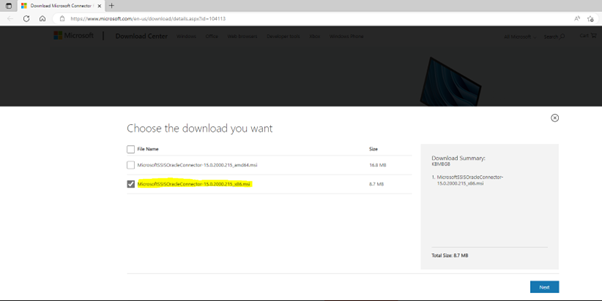
- Download SAS ODBC-drivers from the SAS-homepage. Do a search on the web to find the page.
- Unpack and install odbcdrvrweb__94180__wx6__xx__web__1.zip
This should be done as administrator.
- Unpack and install spdsclibsweb__99150__wx6__xx__web__1.zip
This should be done as administrator.
- It is the best option just to install these drivers as suggested by default during the installation process. If you deviate from this – you can face issues when setting up the connections in ODBC.
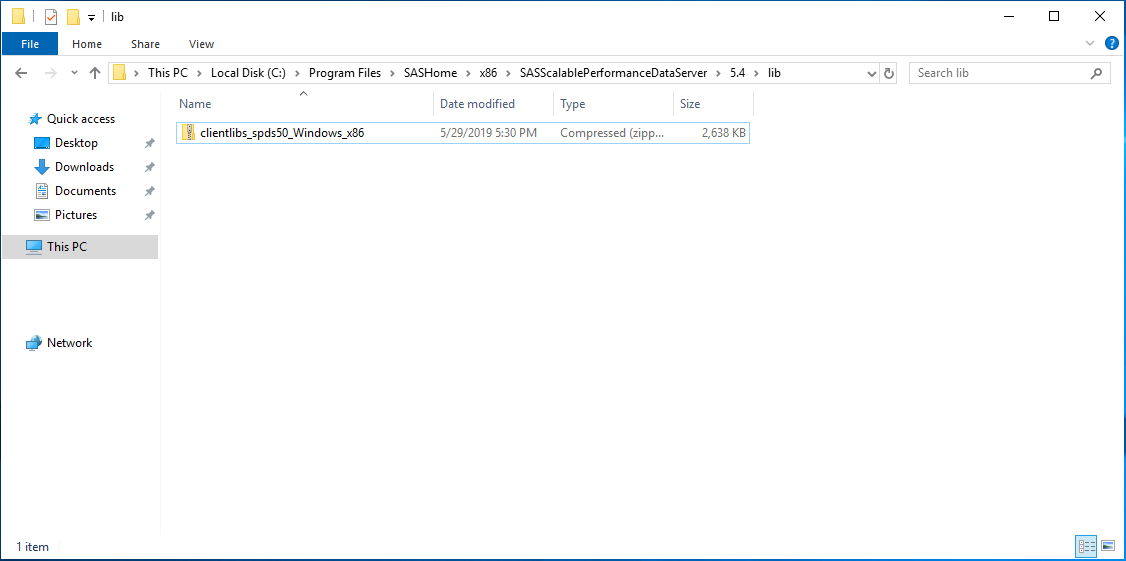
- Extract the file clientlibs_spds50_Windows_x86_64.zip in the directory C:\Program Files\SASHome\SASScalablePerformanceDataServer\5.4\lib into the same directory C:\Program Files\SASHome\SASScalablePerformanceDataServer\5.4\lib.
- Copy all the files from C:\Program Files\SASHome\SASScalablePerformanceDataServer\5.4\lib (excluding the clientlibs_spds50_Windows_x86_64.zip) into the directory C:\Program Files\SASHome\SASDriversforODBC\9.46
If this is to be used by SSIS, then you will need to create these as 32-bit ODBC-connections. SSIS it not able (as of November 2021) to easily handle 64-bit ODBC-connections.
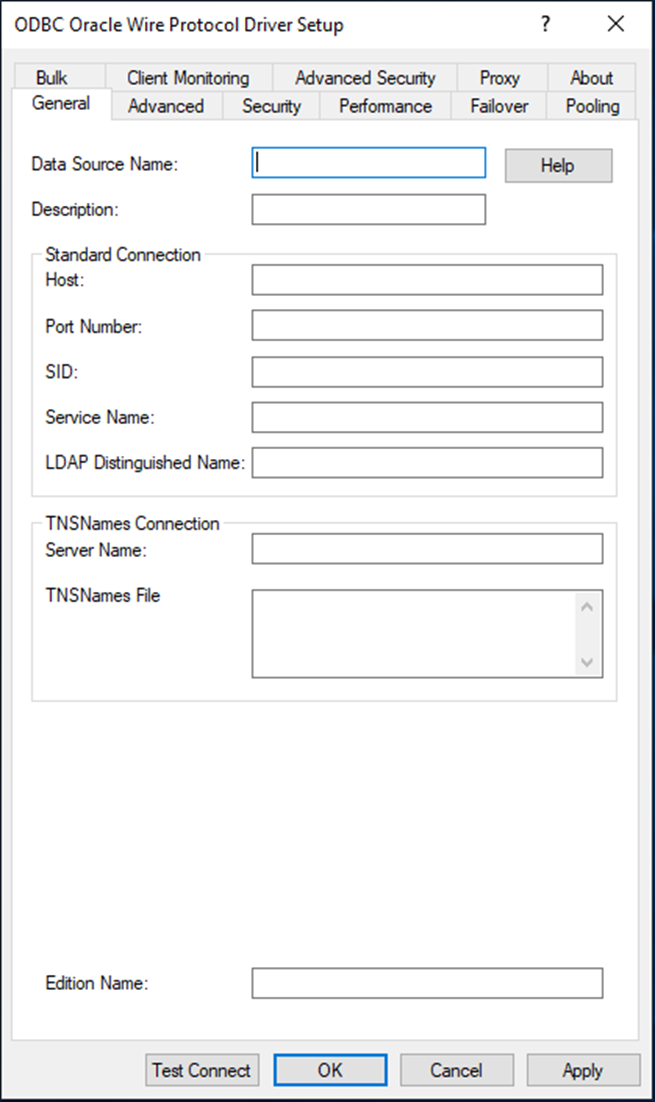
Below example is for the SPDPROD SPD-server library on the SPDSERVER01 server
On the Server-tab
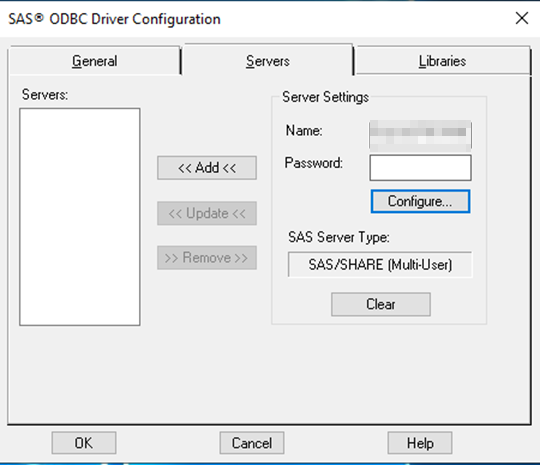
| Name |
<SERVER NAME>.<PORT> e.g. SPDSERVER01.5180 |
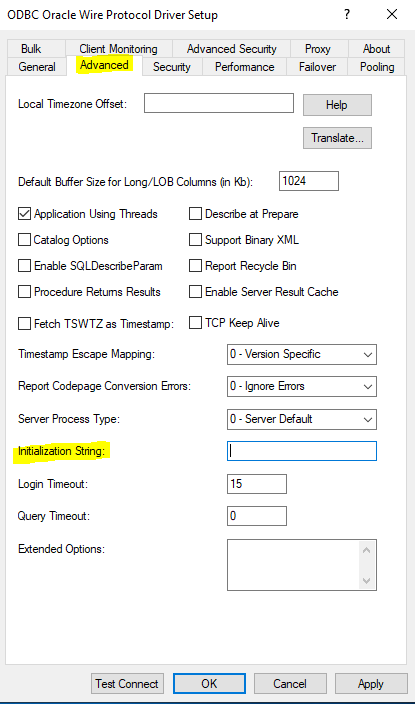
Press the Configure-button (in the dialog above)

| Server Address |
<SERVER NAME> e.g. SPDSERVER01 |
| User Name |
<I THINK THIS MUST BE THE USERNAME FOR USED FOR YOUR DBQ> |
| User Password |
< THE USER PASWWORD FOR USER USED ABOVE> |
| Connection Options |
DBQ='<FOUND IN YOUR SPD-SERVER CONFIGURATION>’ HOST='<SERVER>’ SERV='<PORT>’
E.g.
DBQ='<FOUND IN YOUR SPD-SERVER CONFIGURATION>’ HOST=’SPDSERVER01′ SERV=’5180′ |
On the Libraries-tab
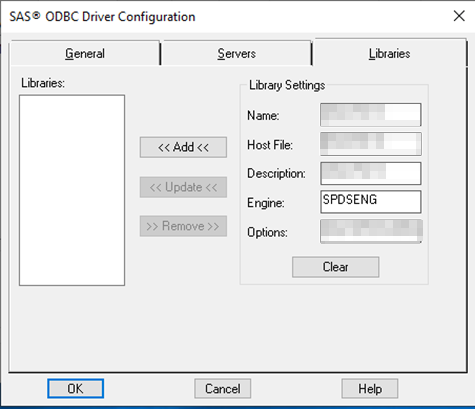
| Name |
<NAME OF THE LIBNAME ON THE SPD-SERVER TO BE ACCESSED> |
| Hostfile |
<NAME OF THE LIBNAME ON THE SPD-SERVER TO BE ACCESSED> |
| Description |
<DESCRIPTION> |
| Engine |
SPDSENG |
| Options |
DBQ='<FOUND IN YOUR SPD-SERVER CONFIGURATION>’ |
If you want to install the 32-bit version of the ODBC-driver after the installation of the 64-bit version of the ODBC-driver.
Then be aware, that the 32-bit version of the ODBC-driver is installed in this folder, if the default installation path is chosen for the 64-bit version of the ODBC-driver: C:\Program Files\SASHome\x86\SASScalablePerformanceDataServer\5.4\lib
If you do not have a tool to test a ODBC-connection available on the machine for the installation. It is possible to test these through PowerShell.
This is possible using the PowerShell code below.
$conn = new-object System.Data.Odbc.OdbcConnection
$conn.connectionstring = "DSN=<NAME OF YOUR ODBC-CONNECTION>; UID=<USERID>; PWD=<USER PASSWORD>"
$conn.open()
$sql = "SELECT * FROM <TABLE IN LIBNAME ON SPD-SERVER>";
$cmd = New-Object System.Data.Odbc.OdbcCommand($sql, $conn);
$rdr = $cmd.ExecuteReader()
$rdr.read()
$rdr.GetValue(0)
$conn.Close();