Installing an Oracle ODBC-driver

Go to https://www.microsoft.com/en-us/download/details.aspx?id=104113 and download the Microsoft Connector for Oracle V1.2 that fits your OS. Here we’ll be using MicrosoftSSISOracleConnector-15.0.2000.215_x86.msi.

MicrosoftSSISOracleConnector-15.0.2000.215_x86.msi is the 32-bit version of the ODBC-driver.
MicrosoftSSISOracleConnector-15.0.2000.215_amd64.msi is the 64-bit version of the same ODBC-driver.

Install MicrosoftSSISOracleConnector-15.0.2000.215_x86.msi on the machine that needs to connect to Oracle.

When the installation is done you should be able to go to create an ODBC Data Sources with the below new Oracle ODBC driver.

Now you can enter the information needed to get access to Oracle-server through ODBC.

If you don’t have or can’t get access through a TNSNames Connection. Then you can go to another location/server/PC and you TNSPing to get the information needed to use Standard Connection.

NB! It is possible to set e.g. the Initialization String in the Advanced-tab.

Quick Guide to installing SAS ODBC-driver for SAS SPD-server

Below is a step-by-step guide to install and configure an ODBC-driver for SAS SPD-server. Be aware, that this guide installs the 64-bit version of the ODBC-driver.

  1. Download SAS ODBC-drivers from the SAS-homepage. Do a search on the web to find the page.
  2. Unpack and install odbcdrvrweb__94180__wx6__xx__web__1.zip
    This should be done as administrator.
  3. Unpack and install spdsclibsweb__99150__wx6__xx__web__1.zip
    This should be done as administrator.
  4. It is the best option just to install these drivers as suggested by default during the installation process. If you deviate from this – you can face issues when setting up the connections in ODBC.
  5. Extract the file clientlibs_spds50_Windows_x86_64.zip in the directory C:\Program Files\SASHome\SASScalablePerformanceDataServer\5.4\lib into the same directory C:\Program Files\SASHome\SASScalablePerformanceDataServer\5.4\lib.
  6. Copy all the files from C:\Program Files\SASHome\SASScalablePerformanceDataServer\5.4\lib (excluding the clientlibs_spds50_Windows_x86_64.zip) into the directory C:\Program Files\SASHome\SASDriversforODBC\9.46

If this is to be used by SSIS, then you will need to create these as 32-bit ODBC-connections. SSIS it not able (as of November 2021) to easily handle 64-bit ODBC-connections.

Below example is for the SPDPROD SPD-server library on the SPDSERVER01 server

On the Server-tab

Name <SERVER NAME>.<PORT> e.g. SPDSERVER01.5180

Press the Configure-button (in the dialog above)

Server Address <SERVER NAME> e.g. SPDSERVER01
User Name <I THINK THIS MUST BE THE USERNAME FOR USED FOR YOUR DBQ>
User Password < THE USER PASWWORD FOR USER USED ABOVE>
Connection Options DBQ='<FOUND IN YOUR SPD-SERVER CONFIGURATION>’ HOST='<SERVER>’ SERV='<PORT>’
E.g.
DBQ='<FOUND IN YOUR SPD-SERVER CONFIGURATION>’ HOST=’SPDSERVER01′ SERV=’5180′

On the Libraries-tab

Name <NAME OF THE LIBNAME ON THE SPD-SERVER TO BE ACCESSED>
Hostfile <NAME OF THE LIBNAME ON THE SPD-SERVER TO BE ACCESSED>
Description <DESCRIPTION>
Engine SPDSENG
Options DBQ='<FOUND IN YOUR SPD-SERVER CONFIGURATION>’

If you want to install the 32-bit version of the ODBC-driver after the installation of the 64-bit version of the ODBC-driver.
Then be aware, that the 32-bit version of the ODBC-driver is installed in this folder, if the default installation path is chosen for the 64-bit version of the ODBC-driver: C:\Program Files\SASHome\x86\SASScalablePerformanceDataServer\5.4\lib

If you do not have a tool to test a ODBC-connection available on the machine for the installation. It is possible to test these through PowerShell.

This is possible using the PowerShell code below.

$conn = new-object System.Data.Odbc.OdbcConnection
$conn.connectionstring = "DSN=<NAME OF YOUR ODBC-CONNECTION>; UID=<USERID>; PWD=<USER PASSWORD>"
$conn.open()
$sql = "SELECT * FROM <TABLE IN LIBNAME ON SPD-SERVER>";
$cmd = New-Object System.Data.Odbc.OdbcCommand($sql, $conn);
$rdr = $cmd.ExecuteReader()
$rdr.read()
$rdr.GetValue(0)
$conn.Close();

Installing and configuring an DB2 ODBC CLI-driver on Windows

An DB2 CLI-driver is a self-sufficient driver that supports a subset of the functions that are provided by the DB2 ODBC-driver.

First download the DB2 ODBC CLI-driver from IBM’s homepage. As such you don’t need to install the driver. You just need to copy it to the location where you want it to reside.
In the below example the directory for the driver is: C:\Software\DB2_ODBC\
The file downloaded from the IBM-homepage is then unpacked into the directory v10.5fp11_nt32_odbc_cli

When the driver is unpacked go to the directory bin. In this directory you need to execute the command db2cli install -setup. This installs/makes the driver visible inside ODBC Data Sources in Windows.

Now you need to create or copy an existing db2cli.ini file to the directory (in this example): C:\Software\DB2_ODBC\v10.5fp11_nt32_odbc_cli\clidriver

Below is an example of what the contents of an db2cli.ini file could be. The db2cli.ini file is “just” a file containing meta-information about the alias that you want to use for you driver inside ODBC Data Sources in Windows.

Now you need to create or copy an existing file db2dsdriver.cfg. This file is to be placed in the directory (in this example): C:\Software\DB2_ODBC\v10.5fp11_nt32_odbc_cli\clidriver\cfg

Below is an example of what the contents of an db2dsdriver.cfg file could be. The db2dsdriver.cfg file contains the more technical information about the alias that you created in the db2cli.ini file. Therefore, the alias in this file must correspond to an alias in the db2cli.ini file. Pointing the alias in the db2cli.ini file to a server and database.

NB! The port number (port=”50000”) in the example below doesn’t have to be the port number used on your system. This is just the default port number for an DB2-instance.

How to install and configure DB2 ODBC driver

The following shows you how I got an ODBC connection to DB2 on a Windows Server 2008R2. After doing a search on the Internet I found this page that really helped me a lot. They do it a bit different.

NEW
If you also want to install the IBM Control Center you might want to look at this page. This also installs the ODBC out-of-the-box.
IBMCS
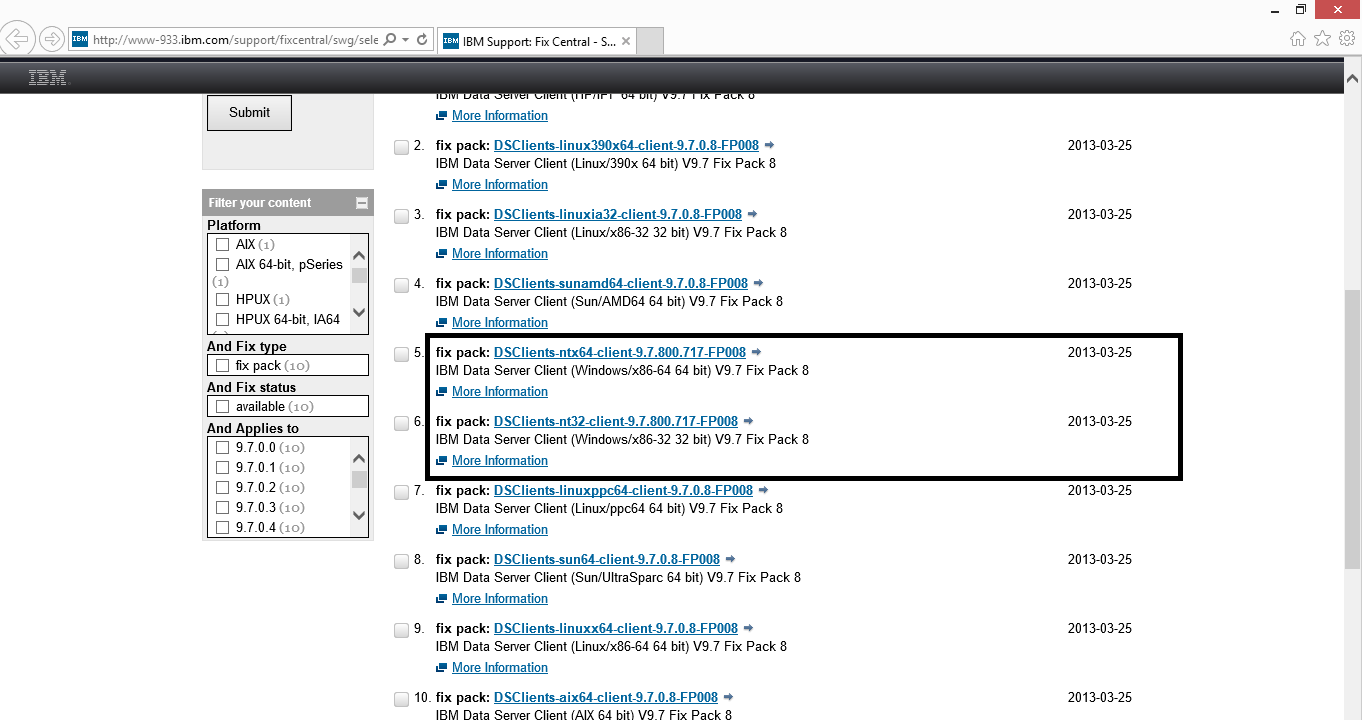
If your need a 32 or 64-bit version for Windows and DB2 version 9.7. You should look for something like this.
IBMDB2CS

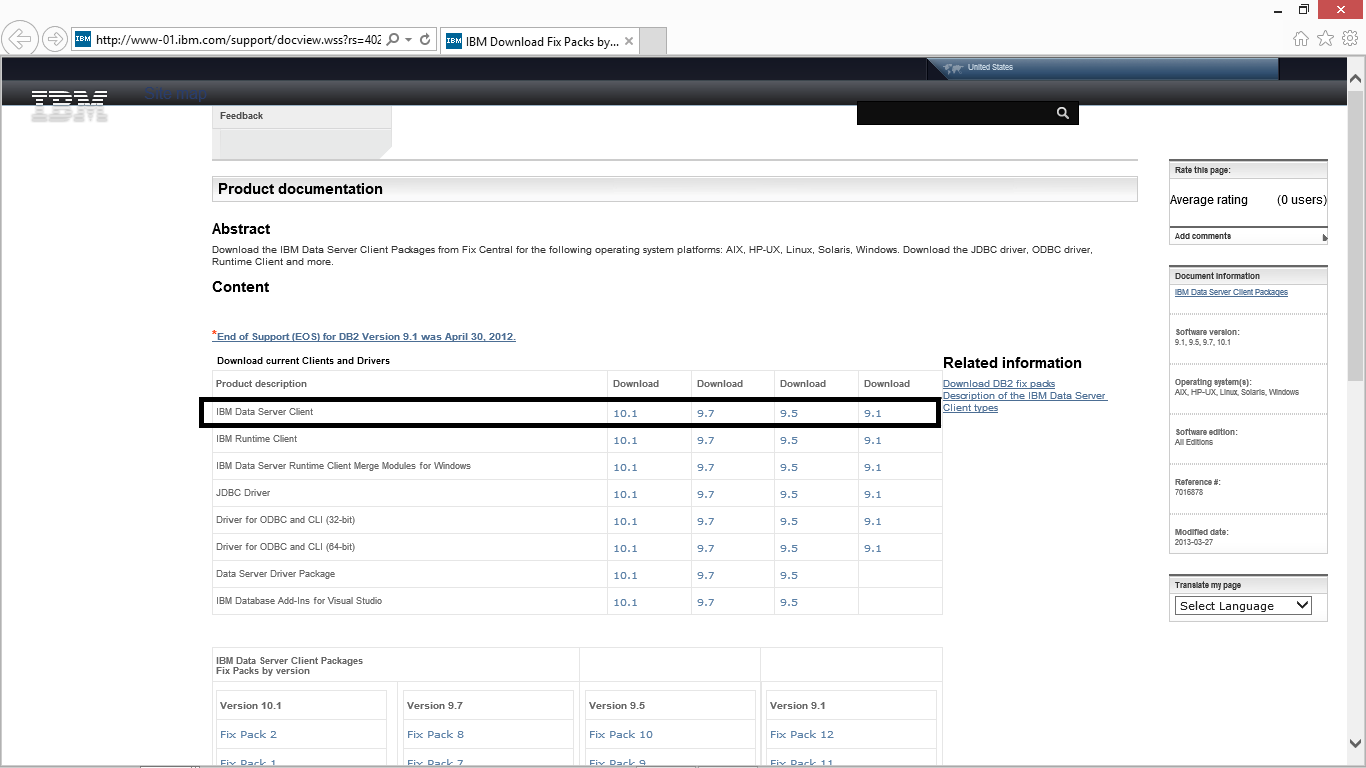
On this page you can find and download the ODBC-drivers that fits your system. I you don’t know what version of DB2 that you’re running, you can contact your DBA. The DB2-version can be found using the command DB2level.
IBM homepage

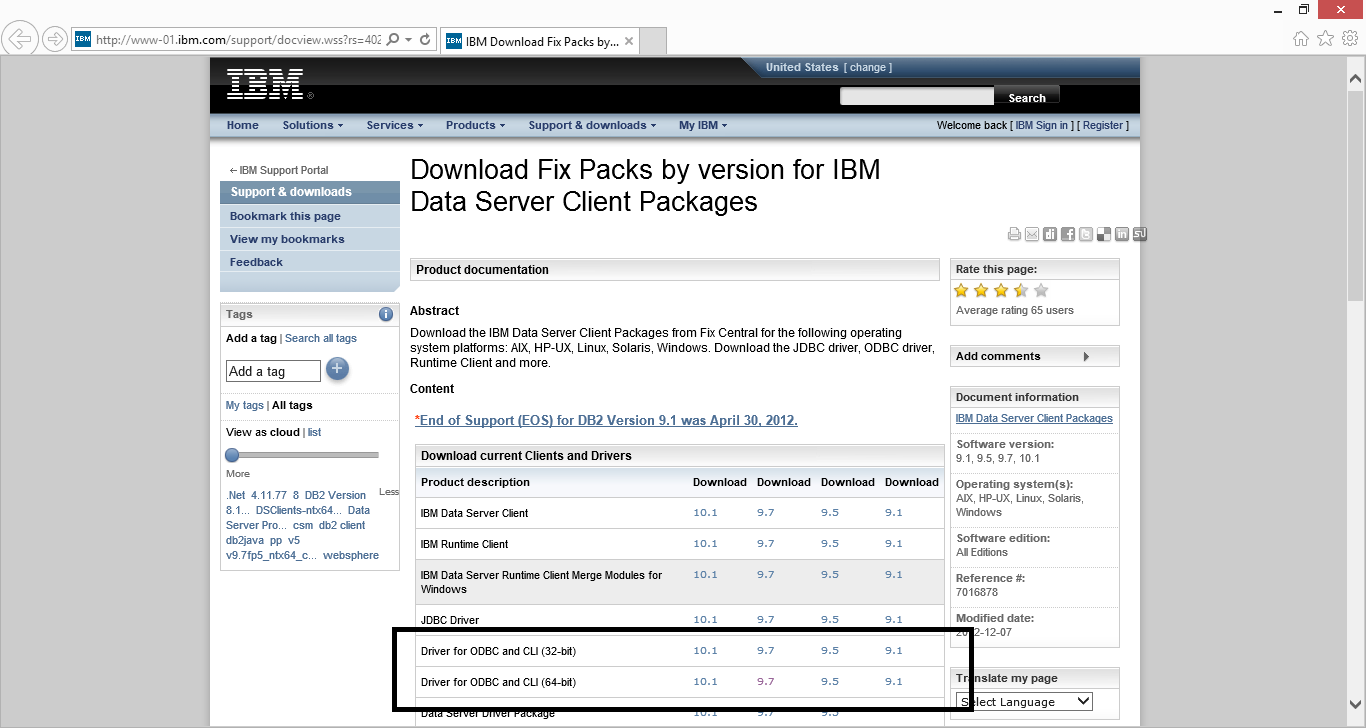
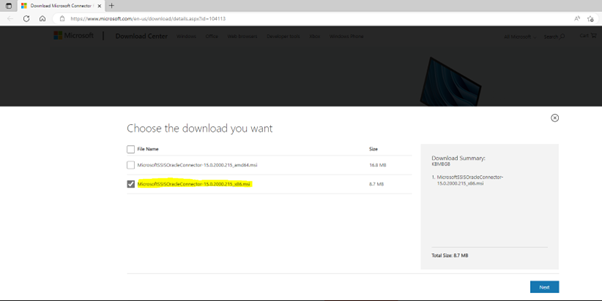
Choose either ODBC 32-bit or 64-bit for your DB2-version and download it for Windows.

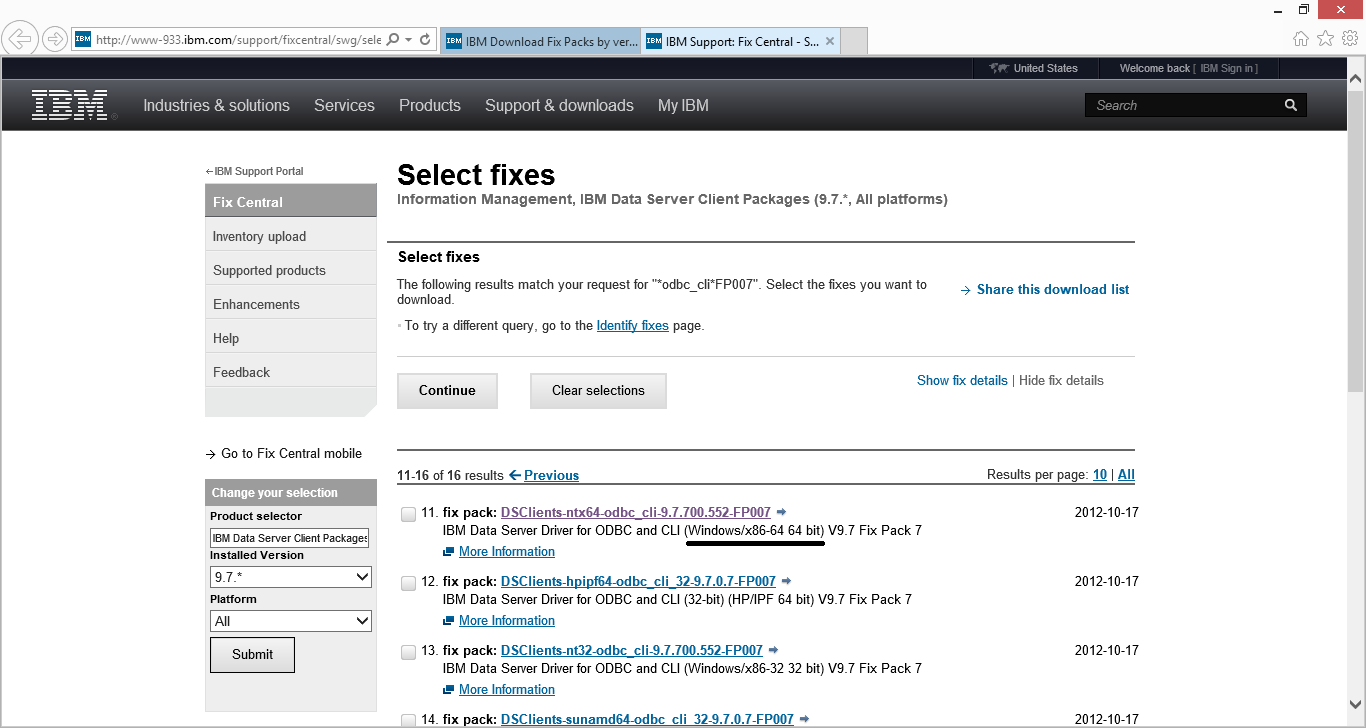
If your need a 64-bit version of the ODBC-driver for Windows and DB2 version 9.7. You should look for something like this.
IBM download

NB! You need to create an IBM-account to download the file.

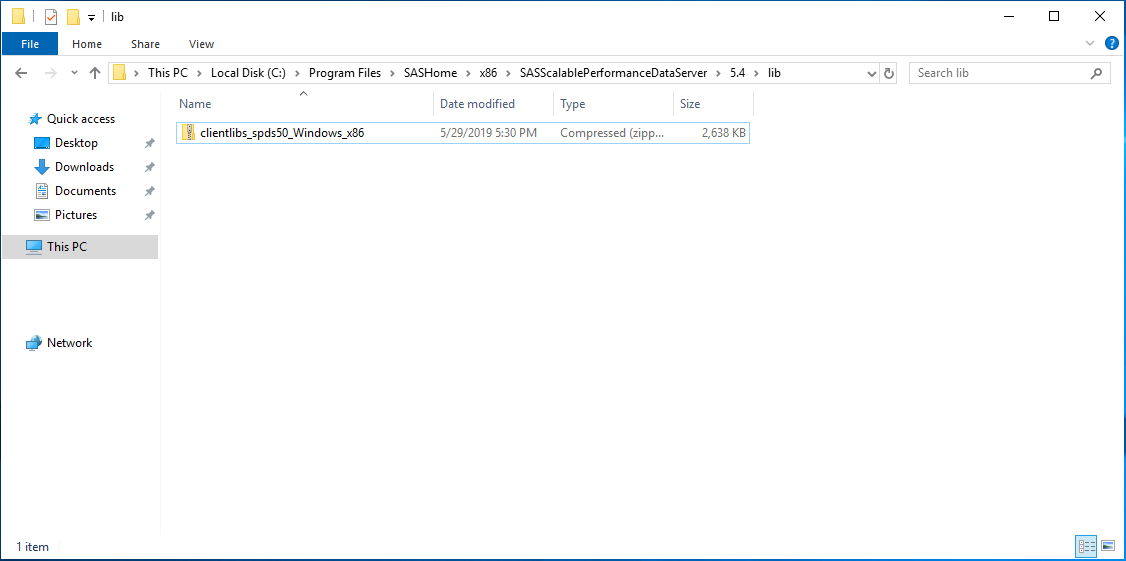
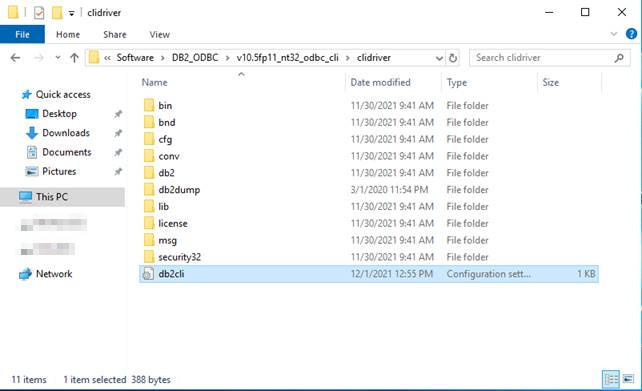
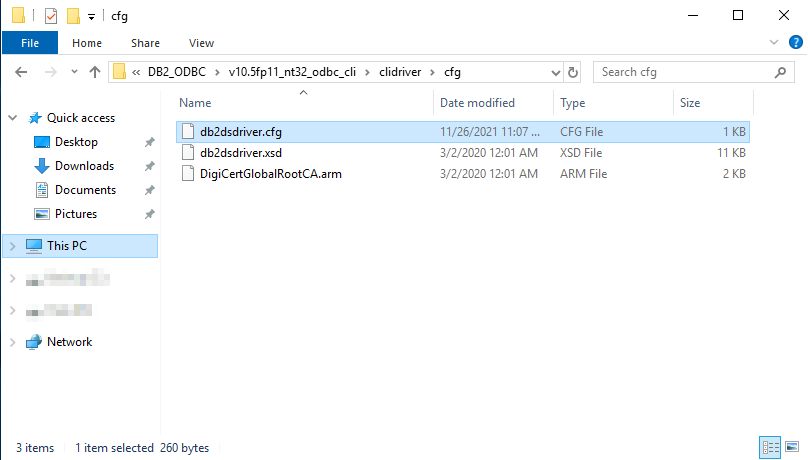
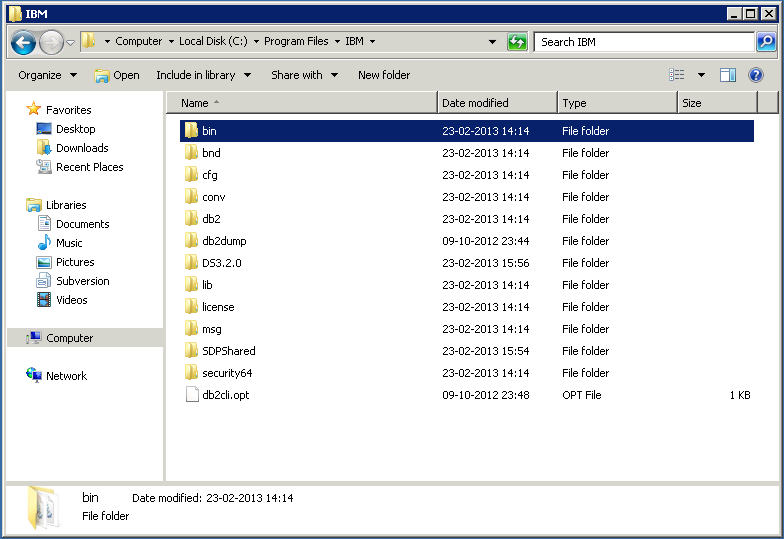
Copy the content of ZIP-file containing the ODBC-driver that you just downloaded to c:\program files\IBM. The path is optional, you can choose a different path if you want to or are using a 32-bit ODBC-driver. The files and folders in c:\program files\IBM, should look something like this.
Dirlist

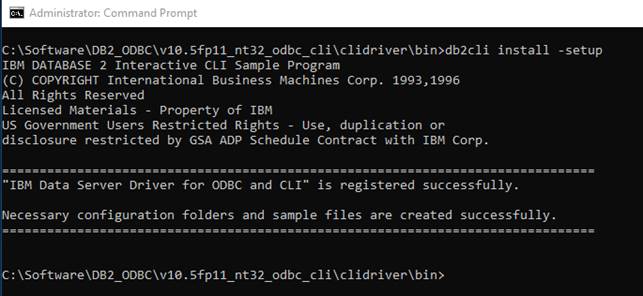
Start a Windows command-prompt as administrator. If you don’t know how to do this, you can take a look at this page.

Go to the folder c:\program files\IBM\bin and type db2oreg1 –i (if you later want to uninstall it type db2org1 –u).
commandprompt

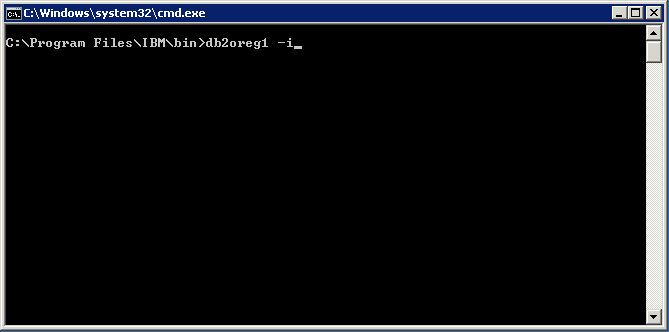
Go to the folder c:\program files\IBM\bin and type db2oreg1 –setup (Thanks to Noel for this comment).
pic13480

This will register the DB2 ODBC-driver in Data Sources (ODBC) on Windows. You can take a look at the drivers tab.
ODBC


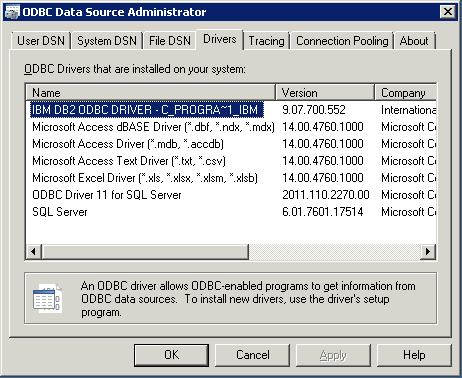
NB! If you have installed af 32-bit version of the ODBC-driver on a 64-bit system, then you have to look in the 32-bit version of the ODBC Administrator to find the driver. The 32-bit version of the ODBC Administrator can be found here: C:\Windows\SysWOW64\odbcad32.exe (Thanks to Grae for this comment)

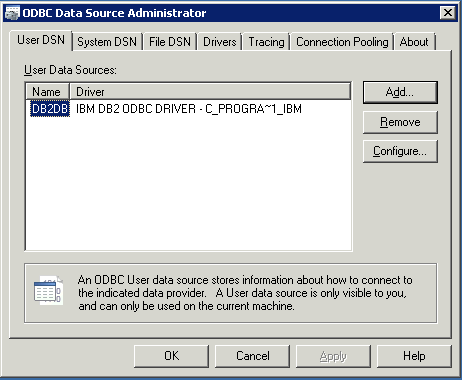
Now you have to setup a ODBC-driver for DB2. You can either make a System or User DSN.
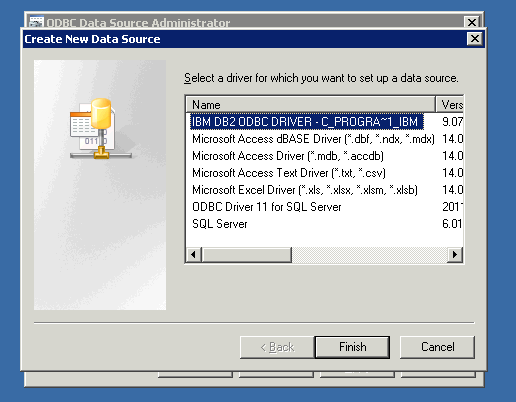
In this example i’m creating a User DSN. Go to the User DSN-tab and press the Add-button.
EmptyODBC


Choose the DB2 ODBC-driver and press the Finish-button.
ODBCAdd


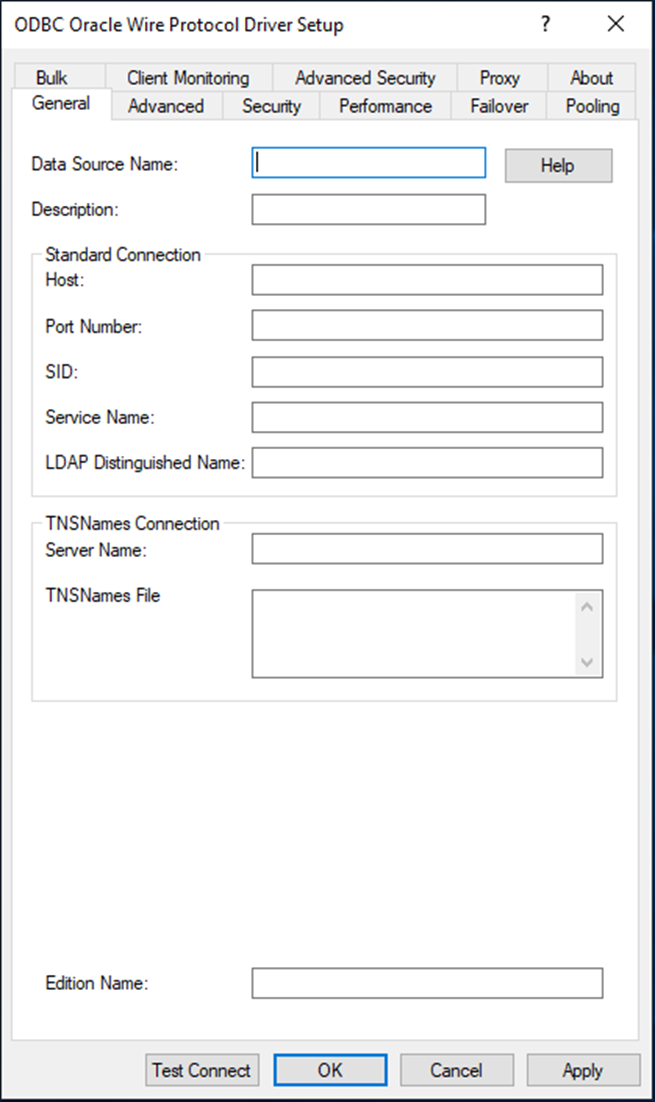
Give the DSN a name that you can use in your programs. Here I have just given it the name DB2DB.
ODBCAddName


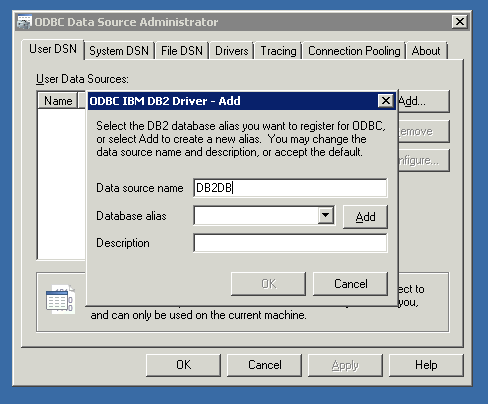
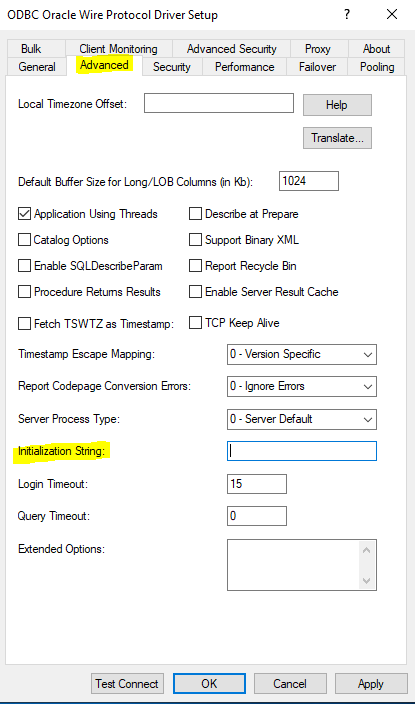
Then press the Add-button and go to the Advanced Settings-tab.
Advancedtab

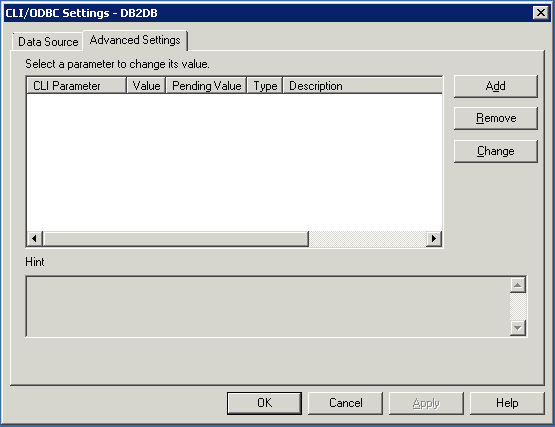
Here you need to press the Add-button to add the settings below.
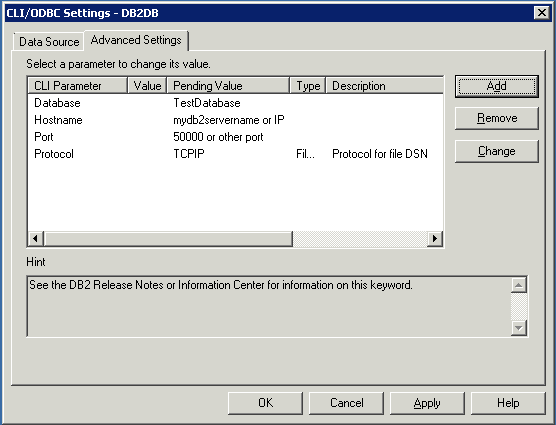
Database: Should point to the database that you want to connect to.
Hostname: Should point to the server where your DB2-server is installed.
Port: The portnumber where the DB2-server on the Hostname is responding.
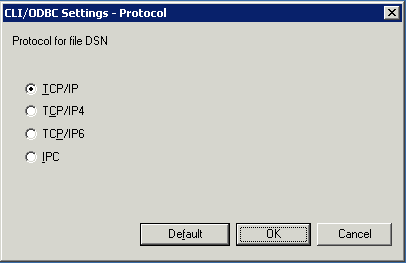
Protocol: The protocol used to connect to the DB2-server. There’s different options as you can se in the picture below.
ProtocolOptions

The final settings should be the ones listed below.

AdvancedtabWithOptions

Now you press the OK-button and you have a new DB2 ODBC connection and your done. You can now use this DB2 ODBC connection in your different programs.
FinalCreation


NOTE
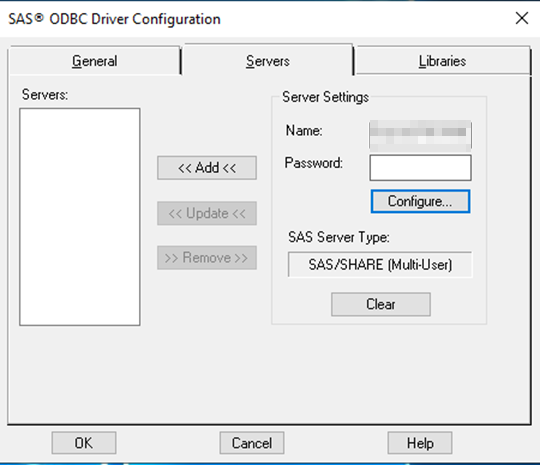
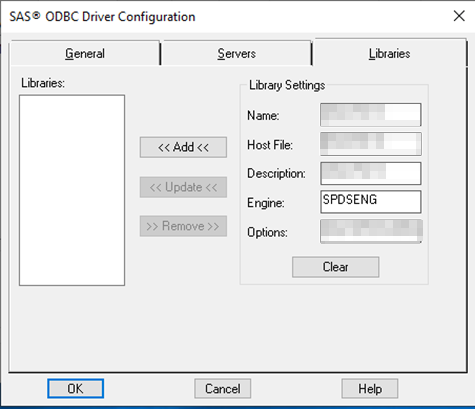
If you get the error described below in SAS. Then you most likely didn’t install the correct version 32/64-bit for your operating system. Install the correct bit-version of the Control Center from the IBM DB2 Client Server pack (further information at the start of this post).

The SAS/ACCESS Interface to DB2 cannot be loaded. The SASDBU code appendage could not be loaded

SAS ODBC-connection directly in SAS

The SAS libname statement below shows you how to make an ODBC-connection to an SQL-server through ODBC without first having to create the ODBC-connection in the OS.

libname <Name of SAS-libname> ODBC NOPROMPT="DRIVER=SQL Server; SERVER=<Name of server>; DATABASE=<Name of database on server>; TRUSTED_CONNECTION=yes" schema=<Name of schema in database> access=readonly;

TRUSTED_CONNECTION=yes‘ tells SAS, that you want to use the AD to provide the password. Remember to grant the AD-user the correct right to the data.

access=readonly‘ is done for precaution. If the user is only suppose to read the data then this should be set on the datasource – not on the libname.

It’s also possible to use a username and password instead of ‘TRUSTED_CONNECTION=yes‘ and AD-user priviliges.

libname <Name of SAS-libname> ODBC NOPROMPT="DRIVER=SQL Server; SERVER=<Name of server>; DATABASE=<Name of database on server>; UID=<name of user>; PWD=<Password for user>" schema=<Name of schema in database> access=readonly;

It’s also possible to make SQL pass-through without having an ODBC-connection in the operating system (OS).

proc sql noprint;

connect to odbc (NOPROMPT="DRIVER=SQL Server; SERVER=<Your server>; DATABASE=<Your DB>; TRUSTED_CONNECTION=yes");
execute ( <Your SQL sentence> ) by odbc;
disconnect from odbc;
quit;

TRUSTED_CONNECTION=yes‘ tells SAS, that you want to use the AD to provide the password. Remember to grant the AD-user the correct right to the data.

It’s also possible to use a username and password instead of ‘TRUSTED_CONNECTION=yes‘ and AD-user priviliges.

proc sql noprint;

connect to odbc (NOPROMPT="DRIVER=SQL Server; SERVER=<Your server>; DATABASE=<Your DB>; UID=<Your username>; PWD=<Your password>");
execute ( <Your SQL sentence> ) by odbc;
disconnect from odbc;
quit;

It’s also possible to make a pass-through connection using an DSN created eg in the ‘Data Sources (ODBC)’ in Windows.

proc sql noprint;

connect to odbc (DSN=<Your DSN name>&nbsp;USER=<Your username>; Password=<Your password>);
execute (

<Your SQL sentence>

) by odbc;
disconnect from odbc;
quit;

Below is a link to an article from SAS explaining different ways of using SAS ODBC-connection directly in SAS . It stats that NOPROMT can’t be used with the SQL Server ODBC Driver, but I haven’t experienced that.

Usage Note 52777: Examples of SAS/ACCESS® Interface to ODBC LIBNAME code used to access a Microsoft SQL Server database without configuring an ODBC data source name
http://support.sas.com/kb/52/777.html